Hello Blog World,

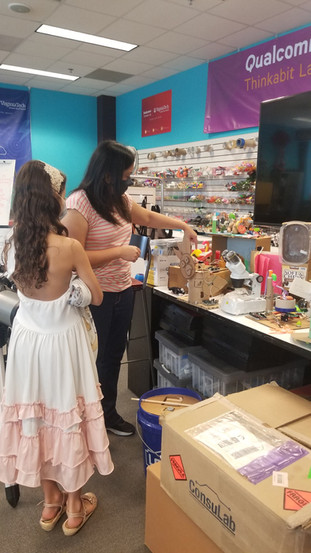
In May 2019, my mom was invited as a Special Guest speaker for the Winners of the Technovation Challenge, to inspire girls to use technology to solve real world problems. The event was hosted by the Virginia Tech University. I also had an opportunity to speak to the girls about using drone to save endangered species. What I enjoyed most was the Thinkabit Lab aka the Tinkerlab. It was full of what looked like toys, but they were used to make different projects with recycled materials and micro controllers.

For the past year, I have been homeschooling and learning different programming languages such as python, JavaScript, and scratch. To learn more about my experience or the languages you can visit my previous blog post HERE. One of my homeschooling goals is to learn about a topic and then apply it to real projects through hands-on experiences. So I asked my mom if she could take me back to the Tinkerlab. Your probably thinking if I can make different projects at home why would I be so excited to go to this Tinkerlab? Good question, at the Tinkerlab I can make different projects using electric components. Here I can play with a Micro:bit! Micro bits are very sensational and fun!
My mom also suggested to have a better understanding about how I can apply the computer languages it would be a great idea for me to work with microcomputers. She made arrangements, we went back to visit the VT campus and met with Dr. Jim, Ms. Rowena, and Ms. Jing who helped me learn about micro:bit.


Now, let's learn about micro:bit, a pocket sized computer. The micro:bit kit includes a mini computer, battery, and a USB micro cable. There are so many projects that you can make with a micro:bit. What decided to make was a Magic8 Square since I didn't have anything that I could make a ball with.
Ms. Jing first taught me about all the different inputs and outputs on the micro:bit. We decided it would be fun to start with a simple LED project. My first project was to make the micro:bit light up like this a happy face emoji:
. . . . . #= lighting up LED
. # . # . .= not lighting up LED
# . . . #
. # # # .
Then, I programed my micro:bit make a blinking heart
. # . # . #= lighting up LED
# # # # # .= not lighting up LED
. # # # .
. . # . .
After that I made my Magic 8sq. The code is kind of long so I won't write it here. But you can find it on the microbit website.


I wanted to have a Magic 8 ball but the only spherical object available was an ornament and it was way to small, so I found a box instead. I cut an open in the box big enough so the lights would show. Then I found some foam to put around my micro:bit so it wouldn't rattle around the box.
Once, the Magic 8sq was decorated I powered it on and asked Dr. Jim asked if he should eat pizza for dinner, it answered "No" and he was impressed. I asked does Mimi miss me and it answered "Bad connection pet a cat," which annoyed me because there was no cat or kitten around.

That's it for now blog world keep inventing till next time Kashmir out.

Comments